[REPLACE CARD]Yidris, Maelstrom Wielder[/REPLACE] | Illustration by Krharts
cEDH games aren’t fair at all, as players want to win with the most broken strategies you can imagine. If you have the resources and are curious about a cool 4-color commander deck to use at your next cEDH event, you may like this one.
[REPLACE CARD]Yidris, Maelstrom Wielder[/REPLACE] is the cascade master, and I’m here to show you how this One Punch Man commander only needs one hit to win the game.
Are you intrigued by what this deck looks like and how it plays? Let’s dive right into it!
The Deck

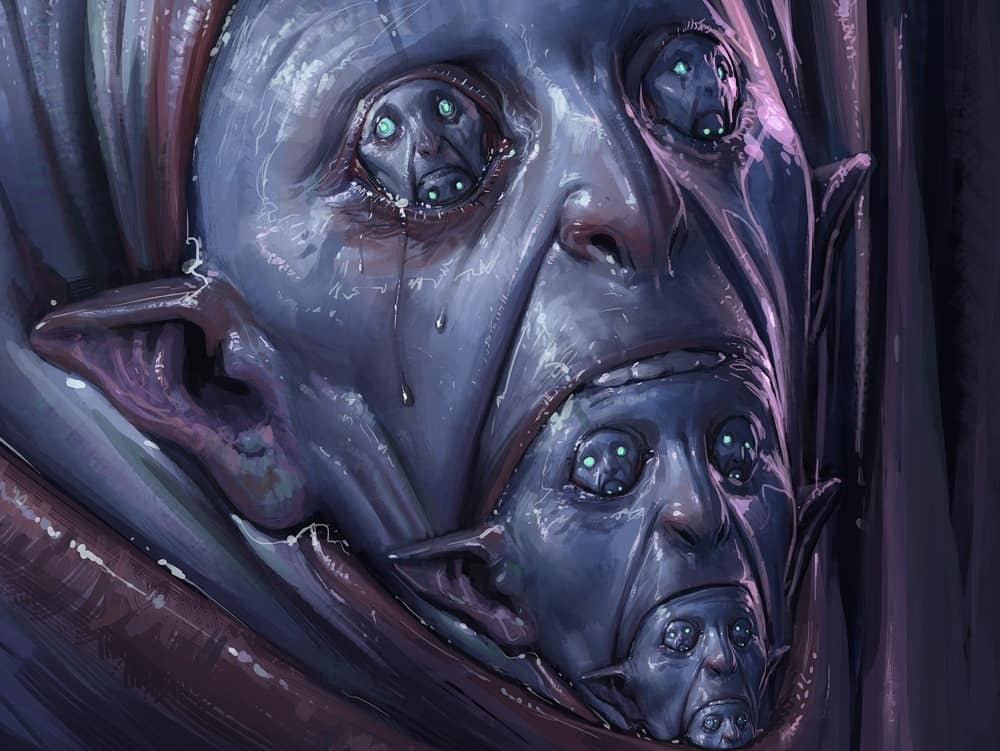
[REPLACE CARD]Mystic Reflection[/REPLACE] | Illustration by YW Tang
Commander
1 Yidris, Maelstrom Wielder
Creature
1 Deathrite Shaman
1 Birds of Paradise
1 Thassa’s Oracle
1 Dockside Extortionist
1 Opposition Agent
1 Notion Thief
Sorcery
1 Gitaxian Probe
1 Ponder
1 Preordain
1 Imperial Seal
1 Demonic Tutor
1 Windfall
1 Yawgmoth’s Will
1 Praetor’s Grasp
1 Wheel of Fortune
1 Wheel of Misfortune
1 Peer into the Abyss
Instant
1 Pact of Negation
1 Repeal
1 Mental Misstep
1 Brainstorm
1 Chain of Vapor
1 Flusterstorm
1 Mystical Tutor
1 Swan Song
1 Dark Ritual
1 Demonic Consultation
1 Vampiric Tutor
1 Lightning Bolt
1 Pyroblast
1 Red Elemental Blast
1 Noxious Revival
1 Nature’s Claim
1 Veil of Summer
1 Brain Freeze
1 Dramatic Reversal
1 Memory’s Journey
1 Mystic Reflection
1 Snap
1 Mana Drain
1 Cabal Ritual
1 Tainted Pact
1 Abrupt Decay
1 Assassin’s Trophy
1 Manamorphose
1 Force of Will
1 Ad Nauseam
Enchantment
1 Mystic Remora
1 Carpet of Flowers
1 Counterbalance
1 Waste Not
1 Underworld Breach
1 Rhystic Study
1 Song of Creation
Artifact
1 Chrome Mox
1 Lion’s Eye Diamond
1 Lotus Petal
1 Mana Crypt
1 Mox Diamond
1 Mox Opal
1 Mana Vault
1 Sensei’s Divining Top
1 Sol Ring
1 Arcane Signet
1 Dimir Signet
1 Fellwar Stone
1 Talisman of Creativity
1 Talisman of Curiosity
1 Talisman of Dominance
1 Wishclaw Talisman
Land
1 Arid Mesa
1 Badlands
1 Bayou
1 Bloodstained Mire
1 Breeding Pool
1 City of Brass
1 Command Tower
1 Exotic Orchard
1 Flooded Strand
1 Forbidden Orchard
1 Gemstone Caverns
2 Island
1 Luxury Suite
1 Mana Confluence
1 Marsh Flats
1 Misty Rainforest
1 Morphic Pool
1 Polluted Delta
1 Scalding Tarn
1 Snow-Covered Island
1 Steam Vents
1 Tropical Island
1 Underground Sea
1 Verdant Catacombs
1 Volcanic Island
1 Watery Grave
1 Windswept Heath
1 Wooded Foothills
Commander (1)
[REPLACE CARD type=”deck”]Yidris, Maelstrom Wielder[/REPLACE]
Creature (6)
[REPLACE CARD type=”deck”]Deathrite Shaman[/REPLACE][REPLACE CARD type=”deck”]Birds of Paradise[/REPLACE][REPLACE CARD type=”deck”]Thassa’s Oracle[/REPLACE][REPLACE CARD type=”deck”]Dockside Extortionist[/REPLACE][REPLACE CARD type=”deck”]Opposition Agent[/REPLACE][REPLACE CARD type=”deck”]Notion Thief[/REPLACE]
Sorcery (11)
[REPLACE CARD type=”deck”]Gitaxian Probe[/REPLACE][REPLACE CARD type=”deck”]Ponder[/REPLACE][REPLACE CARD type=”deck”]Preordain[/REPLACE][REPLACE CARD type=”deck”]Imperial Seal[/REPLACE][REPLACE CARD type=”deck”]Demonic Tutor[/REPLACE][REPLACE CARD type=”deck”]Windfall[/REPLACE][REPLACE CARD type=”deck”]Yawgmoth’s Will[/REPLACE][REPLACE CARD type=”deck”]Praetor’s Grasp[/REPLACE][REPLACE CARD type=”deck”]Wheel of Fortune[/REPLACE][REPLACE CARD type=”deck”]Wheel of Misfortune[/REPLACE][REPLACE CARD type=”deck”]Peer into the Abyss[/REPLACE]
Instant (30)
[REPLACE CARD type=”deck”]Pact of Negation[/REPLACE][REPLACE CARD type=”deck”]Repeal[/REPLACE][REPLACE CARD type=”deck”]Mental Misstep[/REPLACE][REPLACE CARD type=”deck”]Brainstorm[/REPLACE][REPLACE CARD type=”deck”]Chain of Vapor[/REPLACE][REPLACE CARD type=”deck”]Flusterstorm[/REPLACE][REPLACE CARD type=”deck”]Mystical Tutor[/REPLACE][REPLACE CARD type=”deck”]Swan Song[/REPLACE][REPLACE CARD type=”deck”]Dark Ritual[/REPLACE][REPLACE CARD type=”deck”]Demonic Consultation[/REPLACE][REPLACE CARD type=”deck”]Vampiric Tutor[/REPLACE][REPLACE CARD type=”deck”]Lightning Bolt[/REPLACE][REPLACE CARD type=”deck”]Pyroblast[/REPLACE][REPLACE CARD type=”deck”]Red Elemental Blast[/REPLACE][REPLACE CARD type=”deck”]Noxious Revival[/REPLACE][REPLACE CARD type=”deck”]Nature’s Claim[/REPLACE][REPLACE CARD type=”deck”]Veil of Summer[/REPLACE][REPLACE CARD type=”deck”]Brain Freeze[/REPLACE][REPLACE CARD type=”deck”]Dramatic Reversal[/REPLACE][REPLACE CARD type=”deck”]Memory’s Journey[/REPLACE][REPLACE CARD type=”deck”]Mystic Reflection[/REPLACE][REPLACE CARD type=”deck”]Snap[/REPLACE][REPLACE CARD type=”deck”]Mana Drain[/REPLACE][REPLACE CARD type=”deck”]Cabal Ritual[/REPLACE][REPLACE CARD type=”deck”]Tainted Pact[/REPLACE][REPLACE CARD type=”deck”]Abrupt Decay[/REPLACE][REPLACE CARD type=”deck”]Assassin’s Trophy[/REPLACE][REPLACE CARD type=”deck”]Manamorphose[/REPLACE][REPLACE CARD type=”deck”]Force of Will[/REPLACE][REPLACE CARD type=”deck”]Ad Nauseam[/REPLACE]
Enchantment (7)
[REPLACE CARD type=”deck”]Mystic Remora[/REPLACE][REPLACE CARD type=”deck”]Carpet of Flowers[/REPLACE][REPLACE CARD type=”deck”]Counterbalance[/REPLACE][REPLACE CARD type=”deck”]Waste Not[/REPLACE][REPLACE CARD type=”deck”]Underworld Breach[/REPLACE][REPLACE CARD type=”deck”]Rhystic Study[/REPLACE][REPLACE CARD type=”deck”]Song of Creation[/REPLACE]
Artifact (16)
[REPLACE CARD type=”deck”]Chrome Mox[/REPLACE][REPLACE CARD type=”deck”]Lion’s Eye Diamond[/REPLACE][REPLACE CARD type=”deck”]Lotus Petal[/REPLACE][REPLACE CARD type=”deck”]Mana Crypt[/REPLACE][REPLACE CARD type=”deck”]Mox Diamond[/REPLACE][REPLACE CARD type=”deck”]Mox Opal[/REPLACE][REPLACE CARD type=”deck”]Mana Vault[/REPLACE][REPLACE CARD type=”deck”]Sensei’s Divining Top[/REPLACE][REPLACE CARD type=”deck”]Sol Ring[/REPLACE][REPLACE CARD type=”deck”]Arcane Signet[/REPLACE][REPLACE CARD type=”deck”]Dimir Signet[/REPLACE][REPLACE CARD type=”deck”]Fellwar Stone[/REPLACE][REPLACE CARD type=”deck”]Talisman of Creativity[/REPLACE][REPLACE CARD type=”deck”]Talisman of Curiosity[/REPLACE][REPLACE CARD type=”deck”]Talisman of Dominance[/REPLACE][REPLACE CARD type=”deck”]Wishclaw Talisman[/REPLACE]
Land (29)
[REPLACE CARD type=”deck”]Arid Mesa[/REPLACE][REPLACE CARD type=”deck”]Badlands[/REPLACE][REPLACE CARD type=”deck”]Bayou[/REPLACE][REPLACE CARD type=”deck”]Bloodstained Mire[/REPLACE][REPLACE CARD type=”deck”]Breeding Pool[/REPLACE][REPLACE CARD type=”deck”]City of Brass[/REPLACE][REPLACE CARD type=”deck”]Command Tower[/REPLACE][REPLACE CARD type=”deck”]Exotic Orchard[/REPLACE][REPLACE CARD type=”deck”]Flooded Strand[/REPLACE][REPLACE CARD type=”deck”]Forbidden Orchard[/REPLACE][REPLACE CARD type=”deck”]Gemstone Caverns[/REPLACE][REPLACE CARD type=”deck”]Island[/REPLACE] x2[REPLACE CARD type=”deck”]Luxury Suite[/REPLACE][REPLACE CARD type=”deck”]Mana Confluence[/REPLACE][REPLACE CARD type=”deck”]Marsh Flats[/REPLACE][REPLACE CARD type=”deck”]Misty Rainforest[/REPLACE][REPLACE CARD type=”deck”]Morphic Pool[/REPLACE][REPLACE CARD type=”deck”]Polluted Delta[/REPLACE][REPLACE CARD type=”deck”]Scalding Tarn[/REPLACE][REPLACE CARD type=”deck”]Snow-Covered Island[/REPLACE][REPLACE CARD type=”deck”]Steam Vents[/REPLACE][REPLACE CARD type=”deck”]Tropical Island[/REPLACE][REPLACE CARD type=”deck”]Underground Sea[/REPLACE][REPLACE CARD type=”deck”]Verdant Catacombs[/REPLACE][REPLACE CARD type=”deck”]Volcanic Island[/REPLACE][REPLACE CARD type=”deck”]Watery Grave[/REPLACE][REPLACE CARD type=”deck”]Windswept Heath[/REPLACE][REPLACE CARD type=”deck”]Wooded Foothills[/REPLACE]
4-color decks let you slam together many key cards whose effects aren’t otherwise available in other colors. Basically, you pack every cheap spell in this Yidris deck to win the game with its cascade ability.
The Commander
[REPLACE IMG]Yidris, Maelstrom Wielder[/REPLACE]
[REPLACE CARD]Yidris, Maelstrom Wielder[/REPLACE] may not seem it like does much, despite being four colors; in reality, it packs very good synergy with what this deck is trying to achieve. It’s a combo deck whose goal is to win in one turn most of the time.
Yidris plays a huge role in crafting it as a post-combat engine. The idea is to have Yidris hit, then go crazy and start casting spells for free, thanks to the cascade ability.
With many cards that let you manipulate the top of your library, you’ll be casting and crafting your way to victory with ease.
The Removal
You need to play some form of interaction to enable your commander to get through or to stop your opponents from accomplishing their plans. In this deck, you run a mix of different forms of removal in your commander’s colors, primarily instants.
[REPLACE IMG]Lightning Bolt[/REPLACE][REPLACE IMG]Pyroblast[/REPLACE]
The cheapest ones are the red ones like [REPLACE CARD]Lightning Bolt[/REPLACE] and [REPLACE CARD]Pyroblast[/REPLACE]. The latter is very cool as it can also act as a counter most of the time, but once in a blue moon, it can help you to get rid of pesky blue permanents like [REPLACE CARD]Rhystic Study[/REPLACE].
[REPLACE IMG]Lightning Bolt[/REPLACE]
[REPLACE CARD]Lightning Bolt[/REPLACE] is notably good at removing creatures that may want to hose you, like [REPLACE CARD]Notion Thief[/REPLACE], [REPLACE CARD]Drannith Magistrate[/REPLACE], and [REPLACE CARD]Opposition Agent[/REPLACE]. On a bad day, you can also use it to finish off one of your opponents by sending damage to their face.
[REPLACE IMG]Assassin’s Trophy[/REPLACE][REPLACE IMG]Abrupt Decay[/REPLACE]
[REPLACE CARD]Assassin’s Trophy[/REPLACE] and [REPLACE CARD]Abrupt Decay[/REPLACE] are really good at removing permanents, and [REPLACE CARD]Assassin’s Trophy[/REPLACE] works excellent if you control cards that tax your opponents for searching libraries, like [REPLACE CARD]Opposition Agent[/REPLACE].
[REPLACE IMG]Snap[/REPLACE][REPLACE IMG]Repeal[/REPLACE]
Some permanents may be problematic to deal with, as they probably won’t die to conventional removal. You have access to bounce spells like [REPLACE CARD]Snap[/REPLACE] or [REPLACE CARD]Repeal[/REPLACE] to bypass them, the former being great at chaining multiple spells on a single turn. At the same time, the latter can be used at the end of your opponent’s turn, and you’ll get a free card. The other utility this bounce spell has is to help you protect your spells from your opponents’ removal.
The Counter Magic
[REPLACE IMG]Counterspell[/REPLACE][REPLACE IMG]Force of Will[/REPLACE]
Of course, this deck also runs a decent package of countermagic in the form of cards that a blue deck can never miss: [REPLACE CARD]Counterspell[/REPLACE] and [REPLACE CARD]Force of Will[/REPLACE].
[REPLACE IMG]Counterbalance[/REPLACE]
Then, you’ve got [REPLACE CARD]Counterbalance[/REPLACE], a permanent that can counter an opponent’s spells if the spell’s mana value is equal to the mana value of the top card of your library. While this deck has very cheap spells, mostly 1-mana ones, you have ways to manipulate the top of your library to ensure you always get the right spell for when your opponents try to resolve theirs, making Counterbalance a great rattlesnake effect.
[REPLACE GALLERY]Pact of Negation[/REPLACE][REPLACE GALLERY]Mental Misstep[/REPLACE][REPLACE GALLERY]Swan Song[/REPLACE]
Other counterspells in this deck are [REPLACE CARD]Pact of Negation[/REPLACE], [REPLACE CARD]Mental Misstep[/REPLACE], and [REPLACE CARD]Swan Song[/REPLACE]. While each has its specific niche, having some variety at your disposal is always a good idea.
The Taxes
[REPLACE IMG]Rhystic Study[/REPLACE][REPLACE IMG]Mystic Remora[/REPLACE]
Cards like [REPLACE CARD]Rhystic Study[/REPLACE] and [REPLACE CARD]Mystic Remora[/REPLACE] are must-haves in Commander decks. In cEDH tournaments, they’re every blue mage’s bread and butter to gain card advantage each time your opponents play spells.
Storm decks tend to want as many cards as possible, and these two powerful enchantments give you the tools you need. Paying the tax each time may be almost impossible for your opponents, who otherwise may lose tempo by spending the extra mana.
[REPLACE IMG]Notion Thief[/REPLACE][REPLACE IMG]Opposition Agent[/REPLACE]
[REPLACE CARD]Notion Thief[/REPLACE] and [REPLACE CARD]Opposition Agent[/REPLACE] are some other tax elements this deck runs. The former shuts down your opponents’ search effects, and the latter is great at “stealing” card draw from them beyond the first draw on each of their draw steps.
The Tutors
[REPLACE IMG]Vampiric Tutor[/REPLACE][REPLACE IMG]Wishclaw Talisman[/REPLACE]
Tutors are critical for finding win conditions or spells you may need at any given time. This deck, like many others, runs the cheapest ones available in each color. From [REPLACE CARD]Vampiric Tutor[/REPLACE] to [REPLACE CARD]Wishclaw Talisman[/REPLACE], this deck has multiple cards to put you in a favorable position at any given point in the match.
The Win Condition
[REPLACE GALLERY]Brain Freeze[/REPLACE][REPLACE GALLERY]Underworld Breach[/REPLACE][REPLACE GALLERY]Thassa’s Oracle[/REPLACE]
This deck has multiple win conditions. The first one is [REPLACE CARD]Brain Freeze[/REPLACE]. The idea here is to generate enough storm to mill your opponents out or mill yourself to cast a [REPLACE CARD]Thassa’s Oracle[/REPLACE] and escape it from the graveyard with [REPLACE CARD]Underworld Breach[/REPLACE] to win the game.
[REPLACE GALLERY]Demonic Consultation[/REPLACE][REPLACE GALLERY]Tainted Pact[/REPLACE][REPLACE GALLERY]Thassa’s Oracle[/REPLACE]
Speaking of the devil, remember that this is primarily a [REPLACE CARD]Demonic Consultation[/REPLACE] deck. The goal is to win by casting it or [REPLACE CARD]Tainted Pact[/REPLACE] to resolve [REPLACE CARD]Thassa’s Oracle[/REPLACE] and win.
Other Key Cards
[REPLACE IMG]Peer into the Abyss[/REPLACE][REPLACE IMG]Ad Nauseam[/REPLACE]
[REPLACE CARD]Peer into the Abyss[/REPLACE] and [REPLACE CARD]Ad Nauseam[/REPLACE] are the spells that this deck can’t miss.
While they’re somewhat expensive to cast, they give you a lot of card advantage to find the pieces you may be missing to win the game, so they’re critical to your plans.
[REPLACE IMG]Mystic Reflection[/REPLACE]
One cool addition to the deck is the flexible inclusion of [REPLACE CARD]Mystic Reflection[/REPLACE]. You can have your commander enter the battlefield as other creatures, like [REPLACE CARD]Dockside Extortionist[/REPLACE] or [REPLACE CARD]Opposition Agent[/REPLACE], or negate opposing [REPLACE CARD]Thassa’s Oracle[/REPLACE] wins. This card has tons of potential, and while the foretell mechanic may not help much because it’s the only foretell spell in the whole deck, it has greater upside than one may think.
[REPLACE GALLERY]Waste Not[/REPLACE][REPLACE GALLERY]Notion Thief[/REPLACE][REPLACE GALLERY]Wheel of Fortune[/REPLACE][REPLACE GALLERY]Wheel of Misfortune[/REPLACE][REPLACE GALLERY]Windfall[/REPLACE]
[REPLACE CARD]Waste Not[/REPLACE] and [REPLACE CARD]Notion Thief[/REPLACE] are great when paired with the “wheel” effects this deck runs. These effects let you discard your hand and draw cards in exchange, with [REPLACE CARD]Wheel of Fortune[/REPLACE], [REPLACE CARD]Wheel of Misfortune[/REPLACE], and [REPLACE CARD]Windfall[/REPLACE] as the wheel effects for this deck.
[REPLACE GALLERY]Song of Creation[/REPLACE][REPLACE GALLERY]Manamorphose[/REPLACE][REPLACE GALLERY]Gitaxian Probe[/REPLACE]
Lastly, [REPLACE CARD]Song of Creation[/REPLACE] is a cute engine this deck runs to go off in a turn and potentially win the game on the spot by finding your win conditions or tutors that can search for them.
Remember that this deck’s average spell costs 1-2 mana, making it very easy for you to cast as many spells as you like. Some of them are virtually free, like [REPLACE CARD]Manamorphose[/REPLACE], [REPLACE CARD]Gitaxian Probe[/REPLACE], or the 0-mana mana rocks, which in turn synergize very well not only with Song of Creation, but with the deck as a whole. This is an [REPLACE CARD]Ad Nauseam[/REPLACE] deck, after all.
The Mana Base
[REPLACE GALLERY]Sol Ring[/REPLACE][REPLACE GALLERY]Mana Crypt[/REPLACE][REPLACE GALLERY]Talisman of Creativity[/REPLACE][REPLACE GALLERY]Dimir Signet[/REPLACE]
Like many cEDH decks, this deck runs all kinds of mana rocks. [REPLACE CARD]Sol Ring[/REPLACE] and [REPLACE CARD]Mana Crypt[/REPLACE] are at the top of the list to enable potent starts, while cards like [REPLACE CARD]Talisman of Creativity[/REPLACE] or [REPLACE CARD]Dimir Signet[/REPLACE] help you filter your mana and cast your commander a couple of turns ahead of schedule.
[REPLACE IMG]Lotus Petal[/REPLACE][REPLACE IMG]Lion’s Eye Diamond[/REPLACE]
The other way of ramping this deck is through 0-mana artifacts like [REPLACE CARD]Lotus Petal[/REPLACE] or [REPLACE CARD]Lion’s Eye Diamond[/REPLACE]. While they can be used only once in theory, in practice, you can replay them from the graveyard.
[REPLACE IMG]Deathrite Shaman[/REPLACE][REPLACE IMG]Birds of Paradise[/REPLACE]
Other ramp options this deck runs are [REPLACE CARD]Deathrite Shaman[/REPLACE] and [REPLACE CARD]Birds of Paradise[/REPLACE], which, unlike mana rocks, are susceptible to removal but help fix your mana in the early stages of the game.
[REPLACE GALLERY]Dark Ritual[/REPLACE][REPLACE GALLERY]Cabal Ritual[/REPLACE][REPLACE GALLERY]Carpet of Flowers[/REPLACE]
There are niche cards like the rituals ([REPLACE CARD]Dark Ritual[/REPLACE] and [REPLACE CARD]Cabal Ritual[/REPLACE]) that can add tons of mana to cast multiple spells, or utility permanents like [REPLACE CARD]Carpet of Flowers[/REPLACE] that benefit from your opponents’ mana bases.
Speaking of mana base, this deck runs what you expect from cEDH decks: a mix of dual lands in all our commander’s colors, including fetch lands and shock lands.
While 29 lands may seem low, consider that you run 19 other ramp spells in the deck. The fewer lands you run in a storm deck like this, the better.
[REPLACE IMG]Gemstone Caverns[/REPLACE]
One last card I’d like to mention is [REPLACE CARD]Gemstone Caverns[/REPLACE], a land that can ramp you up even before the game has started as long as it’s in your initial hand and you aren’t lucky enough to be the starting player.
The Strategy
By looking at the cards, you may have already guessed that this deck is fairly skill-intensive. You mostly dedicate the early portion of the game to using your ramp spells to put you in a favorable position to cast your commander and then protect it at all costs.
If it survives, you’ve won half the battle. The other part is making it deal combat damage to a player so you can cascade your spells for free.
That said, you can win without your commander, and while that’s easier to do after Yidris has dealt damage to an opponent, the deck is more than capable of winning without it.
At the end of the day, this is a [REPLACE CARD]Thassa’s Oracle[/REPLACE] combo deck, and it relies heavily on the Oracle to win most matches, if not each one. All your plays should be aligned with that in mind.
Combos and Interactions
While casting a [REPLACE CARD]Demonic Consultation[/REPLACE] into a [REPLACE CARD]Thassa’s Oracle[/REPLACE] may not require much skill, there are some deck lines that you should be aware of that may not seem very obvious at first glance.
- [REPLACE CARD]Pyroblast[/REPLACE] is capable of targeting spells or permanents that aren’t blue. This may not seem very intuitive, but it can contribute to the storm count.
- With [REPLACE CARD]Counterbalance[/REPLACE] and [REPLACE CARD]Rhystic Study[/REPLACE] in play, you can always stack your triggers differently to draw spells from the latter if your opponent doesn’t pay the tax and change the spell you have on top.
- [REPLACE CARD]Noxious Revival[/REPLACE] is also very cute at manipulating the top of your library. Like [REPLACE CARD]Vampiric Tutor[/REPLACE] or [REPLACE CARD]Mystical Tutor[/REPLACE], it has strong synergy with [REPLACE CARD]Counterbalance[/REPLACE].
Rule 0 Violations Check
Given the fact that this is a cEDH deck, you’re mostly expected to run any broken synergies and interactions you can think of, and your opponents will, too. No Rule 0 to worry about. Just make sure that they’re also in the same line of thought as you, and don’t try to bring this to kitchen table Magic unless you would like to get banned or lose friends.
Budget Options
cEDH decks aren’t very well-known for playing affordable spells. However, there are some cards you may want to try instead of investing in some of the most expensive ones.
Sometimes, relying on [REPLACE CARD]Spell Pierce[/REPLACE] isn’t enough, so [REPLACE CARD]An Offer You Can’t Refuse[/REPLACE] can help you in a rough spot or prevent your opponent from going for the kill. While giving two Treasure tokens isn’t great, it’s better than losing on the spot.
[REPLACE CARD]Bring to Light[/REPLACE] is a replacement for any of your most expensive tutor spells. While it’s significantly more expensive in terms of mana, it allows you to cast all but your most expensive spells for free, as the cap on converge usually stops at four colors.
I like [REPLACE CARD]Pick Your Poison[/REPLACE] because it’s very versatile in what it does. What’s insane about it is that it doesn’t target an opponent, but rather affects the whole table. While your opponents may be happy with resolving a [REPLACE CARD]Rhystic Study[/REPLACE] each, you’ll just have a greater smile on your face by removing them for 1 mana, all at once.
[REPLACE CARD]Narset, Parter of Veils[/REPLACE] is a strong card in conjunction with your wheel effects, as you can leave your opponents with only one random card in their hand to play.
If you’re looking for good ways to protect your combo, you can rely on [REPLACE CARD]Dosan the Falling Leaf[/REPLACE], which prevents your opponents from casting spells on your turn. Just remember that Dosan’s ability only stops players from casting spells; it doesn’t stop triggered or activated abilities.
Other Builds
Instead of focusing on [REPLACE CARD]Thassa’s Oracle[/REPLACE] combo, you could in theory just be a wheel deck by adding more wheel effects.
[REPLACE CARD]Reforge the Soul[/REPLACE], [REPLACE CARD]Dark Deal[/REPLACE], and even [REPLACE CARD]Dragon Mage[/REPLACE] are good wheel effects, and you can combine them with the likes of [REPLACE CARD]Megrim[/REPLACE], [REPLACE CARD]Liliana’s Caress[/REPLACE], or [REPLACE CARD]Sheoldred, the Apocalypse[/REPLACE].
You can also rely on spells like [REPLACE CARD]Whispering Madness[/REPLACE] to win the game, but that would imply relying more on your combat phase with Yidris.
Commanding Conclusion
[REPLACE CARD]Peer into the Abyss[/REPLACE] | Izzy
While being a skill-intensive deck to run, Yidris Storm is a Commander deck that may have only a few lines of winning games, but is definitely one of the strongest ones out there.
I know everybody hates [REPLACE CARD]Thassa’s Oracle[/REPLACE] decks, but they’re by far one of the most solid strategies for winning cEDH games, and I wanted to show you a deck that uses them at their peak potential.
What would you change about the deck? Would you use a secondary approach for it? Let us know in the comments or at the Draftsim Discord!
As always, it’s a pleasure writing and diving into decks for you to read, make sure to follow us on our socials to never miss a post.
Take care and see you next time!
 CodyCross is one of the Top Crossword games on IOS App Store and Google Play Store for 2018 and 2019. We have decided to help you solving every possible Clue of CodyCross and post the Answers on our website. CodyCross is an enthralling word puzzle game developed by Fanatee, Inc. Available on both iOS and Android platforms, you can find this engaging game under the Games/Word category in their respective app stores. CodyCross offers players a versatile gaming experience with two primary modes to choose from: Adventure and Packs. In Adventure mode, you’ll journey through a story-filled landscape, solving crossword puzzles that challenge your intellect at every turn. On the other hand, the Packs mode provides thematic puzzles that revolve around various topics, ensuring you never run out of fresh challenges. Whether you’re a word aficionado looking to put your vocabulary to the test, or a casual player seeking a fun and intellectually stimulating game, CodyCross has something to offer for everyone. Its user-friendly interface, thought-provoking clues, and diverse categories make it a go-to choice for crossword enthusiasts of all ages. On this page we have the solution or answer for: Word Meaning Crow In Spanish. This clue or question is found on Puzzle 7 of Elvis Presley Easy Pack.


 You will find here answers and solutions for all 20 Groups and 100 Puzzles from Fantasy World of CodyCross. CodyCross is one of the Top Crossword games on IOS App Store and Google Play Store for years 2018, 2019 and 2020. We have decided to help you on solving every possible Clue of CodyCross and post the Answers on this website. CodyCross is a captivating word puzzle game developed by Fanatee, Inc., available on both iOS and Android platforms. You can locate this engaging game under the ‘Games/Word’ category in the respective app stores, and it offers two distinct modes to satisfy different kinds of puzzle enthusiasts: Adventure and Packs. In Adventure mode, players traverse through an immersive storyline, solving a wide array of crossword puzzles that get progressively challenging. The mode not only tests your vocabulary but also serves a narrative experience, making each solved puzzle a stepping stone in a larger journey. On the other hand, Packs mode offers a collection of theme-based puzzles, covering everything from history and culture to science and technology. This allows players to hone their skills in specialized subjects while enjoying a traditional crossword setup. Whether you’re a novice looking for a casual word game or a seasoned puzzle solver seeking a brain-teasing challenge, CodyCross offers something for everyone. Check below the solutions for Fantasy World puzzles.


